Before Getting Started.
What is 'VRAM'?
VRAM stands for Video RAM or Video Random Access Memory and is used for tasks requiring extra video processing.
What benefits are there to increasing VRAM?
Increasing VRAM can stop limiting to performance which is enabled by default for battery saving performance.
Can my laptop's VRAM be increased?
It depends on what CPU you have, this will only work with laptops that have Intel CPUs. This method does not work with laptops with 5th gen CPUs or older or with laptops that have an extra Dedicated Graphics Card
There is a video tutorial.
Steps
Before We Start
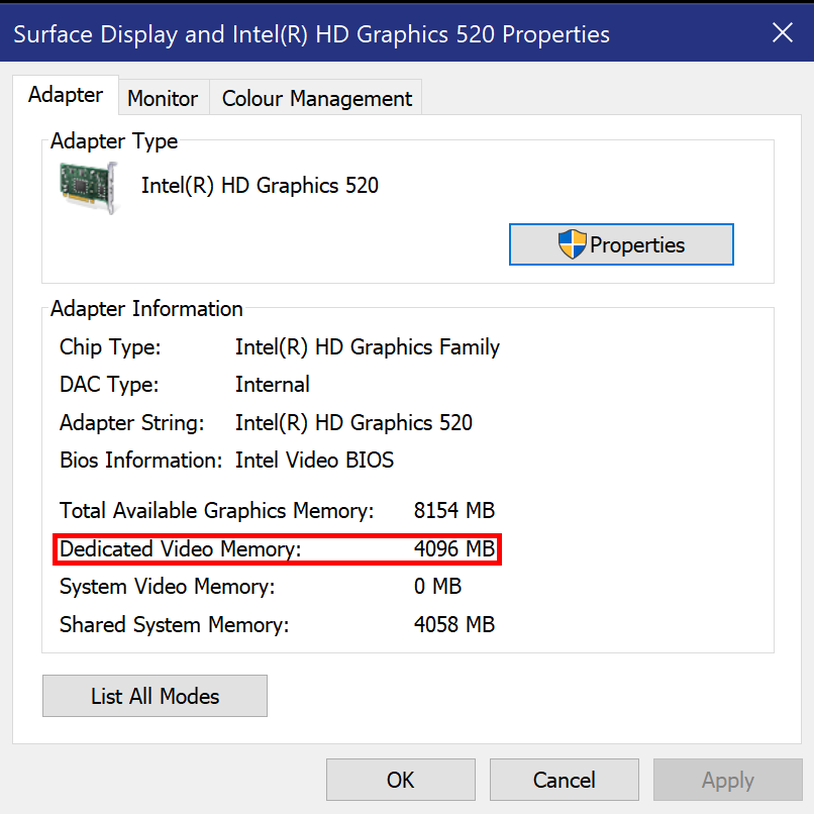
You may want to check your VRAM before you start to get an idea of how much this helps. This can be done by going to your device's settings then click 'System' and then 'Display' and then 'Display Adapter Properties' this should be at the bottom of the 'Display' window if you have the latest windows update.
You may want to check your VRAM before you start to get an idea of how much this helps. This can be done by going to your device's settings then click 'System' and then 'Display' and then 'Display Adapter Properties' this should be at the bottom of the 'Display' window if you have the latest windows update.
|
Step 1.
After starting your computer as you usually would, click on the little circle on your task bar this button is used to activate Cortana. When the text box pops up type settings and when the application appears press enter. This should open the device settings. |

|
Step 2.
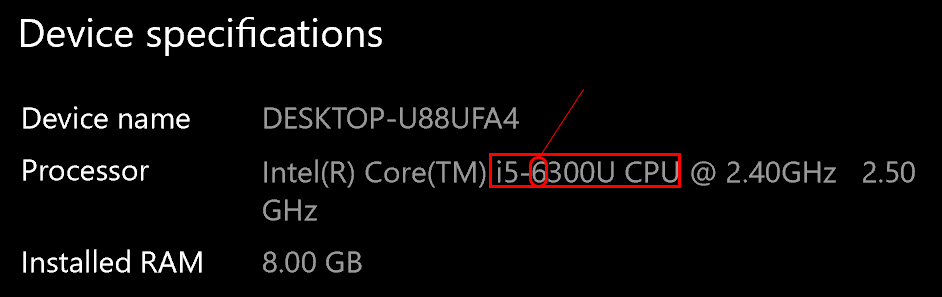
Once in the settings click on 'System' and then 'About' to check what Processor and make sure the first number after the i3, i5 or i7 is 6 or higher. If the number is not 6 or higher this method will not work.
Once in the settings click on 'System' and then 'About' to check what Processor and make sure the first number after the i3, i5 or i7 is 6 or higher. If the number is not 6 or higher this method will not work.
Step 3.
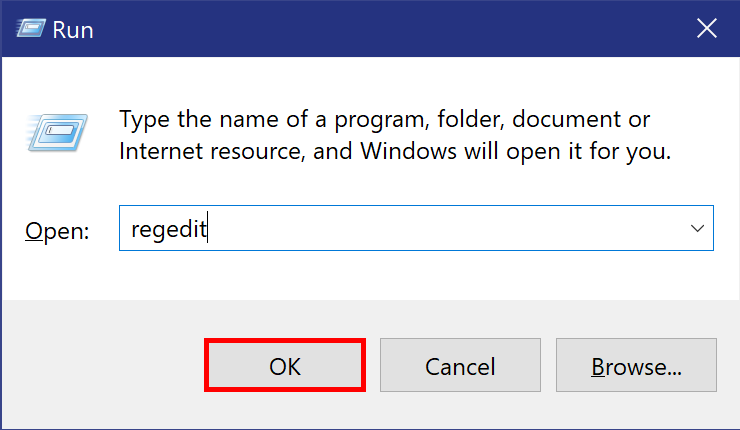
The next step is to open the Registry Editor using the Run program starter. There are two ways of doing this the first is pressing the Windows key and 'R' at the same time which will bring up the 'Run' window. The second method can be done by clicking on the Cortana button on the task bar and type 'Run' and press enter when the 'Run' box comes up. In the window there will be a text box , click on the box and type 'regedit' and press enter. Doing this should open another window asking for permission to make changes to the device. Click yes and then proceed to the next step.
The next step is to open the Registry Editor using the Run program starter. There are two ways of doing this the first is pressing the Windows key and 'R' at the same time which will bring up the 'Run' window. The second method can be done by clicking on the Cortana button on the task bar and type 'Run' and press enter when the 'Run' box comes up. In the window there will be a text box , click on the box and type 'regedit' and press enter. Doing this should open another window asking for permission to make changes to the device. Click yes and then proceed to the next step.

|
|
Step 4.
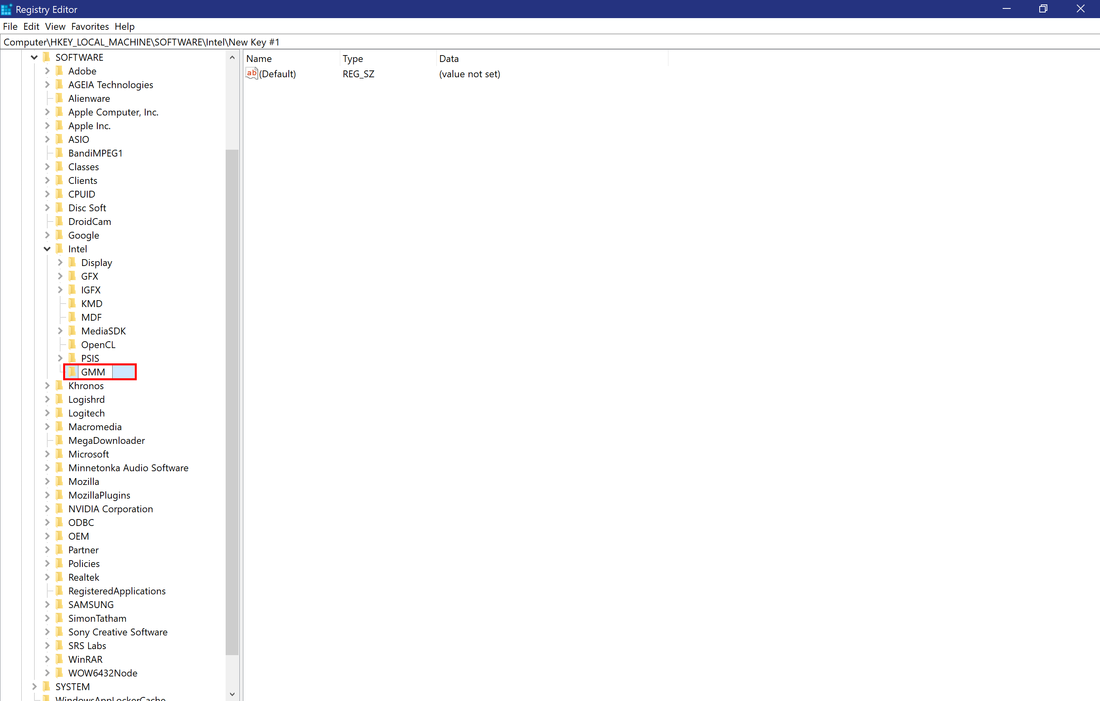
Once you have opened the Registry Editor navigate to 'Intel' in the editor by clicking the dropdown menu for HKEY_LOCAL_MACHINE then SOFTWARE and in the drop-down menu for SOFTWARE you will find Intel. Select it and proceed to the next step.
Once you have opened the Registry Editor navigate to 'Intel' in the editor by clicking the dropdown menu for HKEY_LOCAL_MACHINE then SOFTWARE and in the drop-down menu for SOFTWARE you will find Intel. Select it and proceed to the next step.

Step 5.
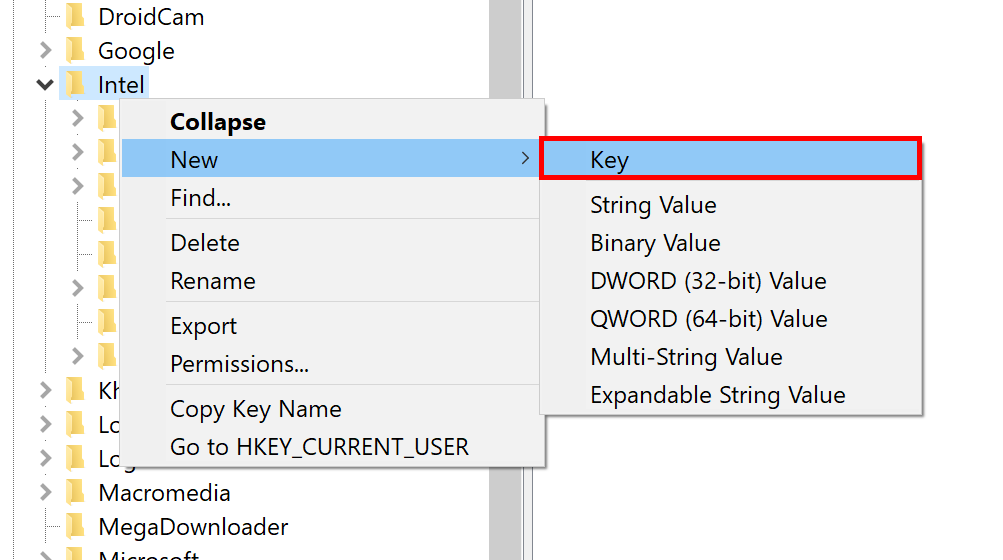
Right-click on 'Intel' hover over New and when the second menu pops up select 'Key' and name it 'GMM'.
Right-click on 'Intel' hover over New and when the second menu pops up select 'Key' and name it 'GMM'.
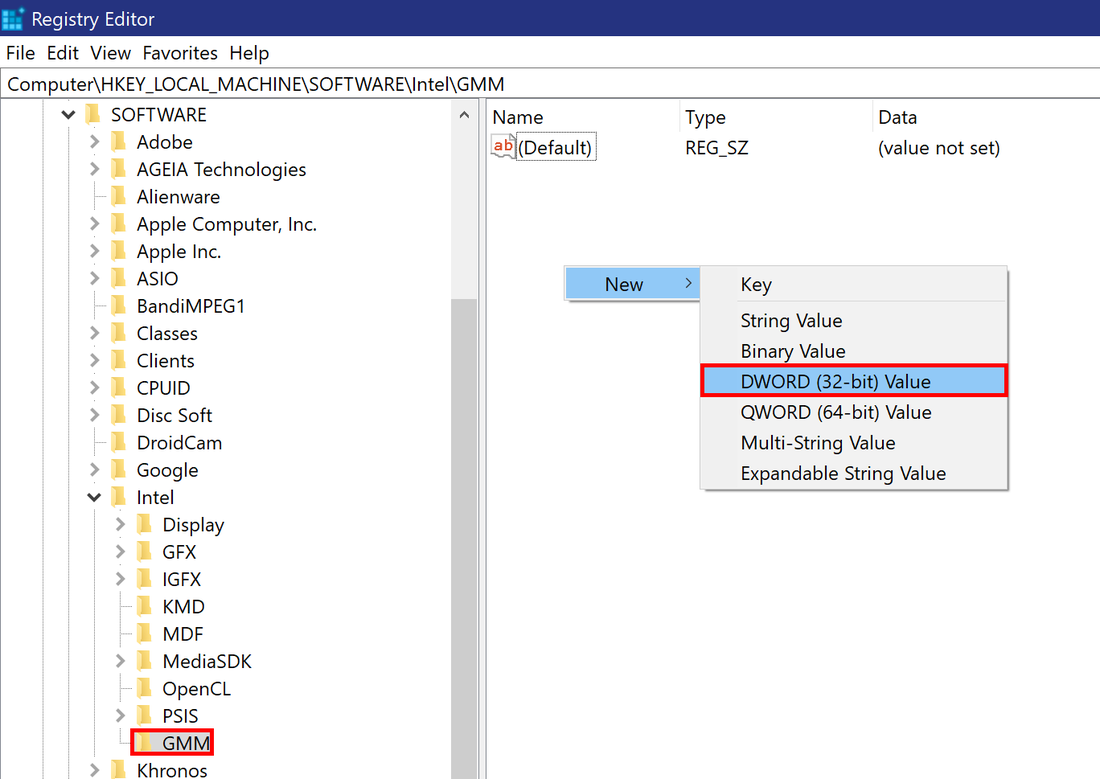
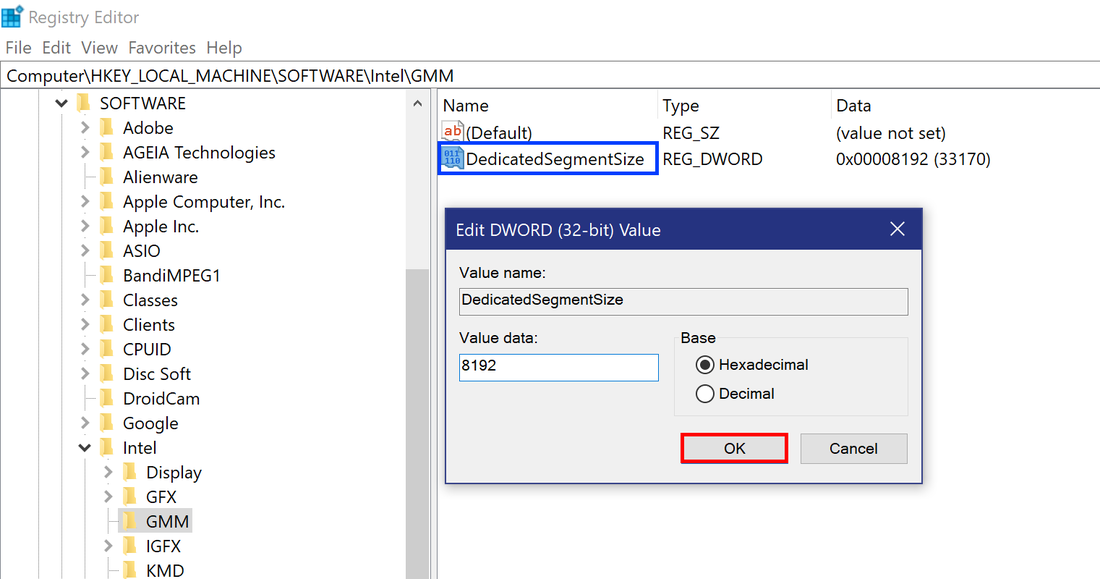
Step 6.
Now select the 'GMM' key you've just created and right-click in the box on the right of the navigation menu and hover over 'New' again and then click 'DWORD (32-bit) Value' this should make a new box, name it Dedicated Segment Size as shown surrounded in blue in the image below. Once you have done this double-click on the segment you just created to add a value. Select Hexadecimal and now type in the amount of RAM you have in MB instead of GB and press enter or click 'OK'. There are images of the process below.
Now select the 'GMM' key you've just created and right-click in the box on the right of the navigation menu and hover over 'New' again and then click 'DWORD (32-bit) Value' this should make a new box, name it Dedicated Segment Size as shown surrounded in blue in the image below. Once you have done this double-click on the segment you just created to add a value. Select Hexadecimal and now type in the amount of RAM you have in MB instead of GB and press enter or click 'OK'. There are images of the process below.
|
|
Step 7.
Almost finished, all that's left to do is to restart your laptop and check the amount of Dedicated VRAM in your device settings. Once restarted go to your settings and check how much VRAM you have as shown in the 'Before We Start' section of this guide.
Almost finished, all that's left to do is to restart your laptop and check the amount of Dedicated VRAM in your device settings. Once restarted go to your settings and check how much VRAM you have as shown in the 'Before We Start' section of this guide.
If you had any problems with this guide head over to the 'Contact' page of this website and tell me what you had a problem with.
